Bathroom Overhaul!
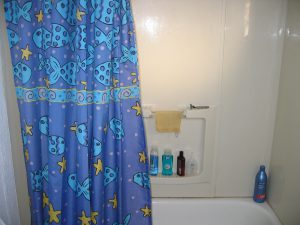
Wow! Have you ever set out to tackle a home improvement project and felt like you were trundling a large boulder off a steep cliff? (Actually illegal in Colorado) Well, we certainly have. We’d been planning to replace the cheap vinyl shower enclosure in our upstairs bathroom for some time, and a convergence of guests arriving around the July 4th holiday seemed like the perfect deadline/excuse for the task. I insisted on starting about a month before our guests were to arrive, but Jess was certain that this was far more “contingency” time than could possibly be required. How wrong she was!
Of course, if the project’s scope had remained constant, Jess would have been correct, but this project, like so many others, developed a life of its own. As we began the demolition, crossing the point-of-no-return, it became apparent that we were in for more than just tiling the shower enclosure.
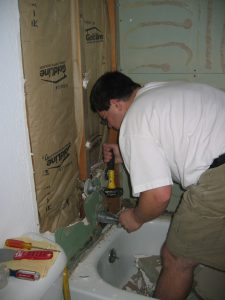
We began by disassembling the existing hot/cold faucets and the tub filler sport. With the hardware out of the way, we turned our attention to the 3-piece vinyl shower enclosure. Grabbing the enclosure by the outside corners we quickly tore it away from the wall in large pieces. The vinyl had become brittle and cracked in several places as it was pried from the underlying drywall. Once the surround had been removed we took to the existing drywall with sledge hammers and fists, quickly filling the little room with dust and debris. Before too much time had passed we were rewarded with a lovely view of the interior walls surrounding our bathtub.
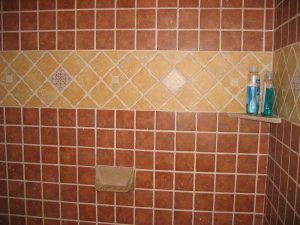
Next we prepped the walls for the tile by wrapping the entire wall with asphalt roofing paper. The paper was applied in two long sheets that overlapped by several inches at the middle and fastened to the studs with an industrial staple gun. We marked the location of the studs on the roofing paper and cut and hung several sheets of 1/2″ Hardibacker directly to the studs. The tile I had selected was a rather heavy glazed porcelain available in several colors from Lowes and the backer board was essential if the new walls were to be capable of supporting the heavy tile work. After hanging the backer board, it was apparent that the new walls did not match up with the existing walls. This was due in part to our attempts to fix the terribly out-of-plumb walls and the faux plaster texture on the existing walls. Because of these two problems we decided to replace the remainder of the two walls adjacent the shower enclosure, and we stripped the faux texture from the wall opposite the shower. A couple of hours of additional demolition work, another trip to Home Depot, and a precarious drive home with several sheets of 1/2″ green board tied to the roof of Taco (our 2000 Dodge Neon), and we were ready to replace the drywall.
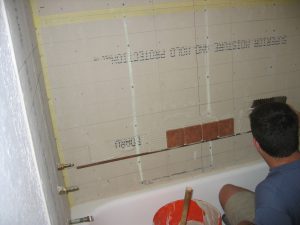
Of course, about this time we realized that we should really add a ceiling fan/overhead light to the bathroom. For some reason the bathroom has never had any ventilation, and in the winter, this really causes problems. The bathroom becomes extremely steamy and when the door open it sets of smoke detectors all over the house. While it’s nice to test the smoke detectors from time-to-time, 6:30 in the morning isn’t a universally accepted time!
The floor in the bathroom has always been an embarrassingly dingy black and white vinyl tile affair, and occasional leaks have brought water into the kitchen via the ceiling. We knew that this was the proper time to do something with the floor, so about 6
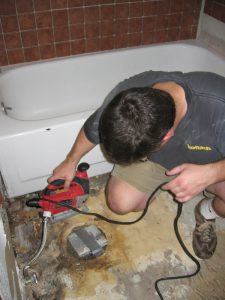
additional trips to Home Depot and Lowes solidified a design that would use 12″ x 12″ glazed porcelain tiles that matched the tiles used in the shower enclosure. Of course, when we removed the toilet and vanity, we discovered that the years of sloppy shower taking and the poorly constructed floor had led to extensive
water damage. There was no way that we could simply ignore the problem, so a jigsaw and eventually a sawzall was needed to remove all of the rotten subfloor, and a patch was cut to size from 3/4″ plywood. The patch actually spanned 2 floor joists and was pretty solid, but some additional support was necessary where the new subfloor met the existing subfloor at the edge of the tub. A 2×4 was cut to span the joint and screwed into the existing subfloor on either side of the patch. The new patch was then fastened to the 2×4 in order to provide some additional support. A final touch was the liberal use of leveling compound to further repair the damaged subfloor.
After the leveling compound was dry, we attached 2 sheets of 1/4″ thick Hardibacker to the subfloor. A cut-out for the closet flange (toilet drain) was made in one of the pieces of backer board, and the 2nd piece was trimmed slightly to match the small bathroom footprint. Additional cuts were necessary for the hot and cold supply lines that energe from the floor under the vanity. The backer board was positioned perpendicular to the patch in the subfloor in order to add additional stability.
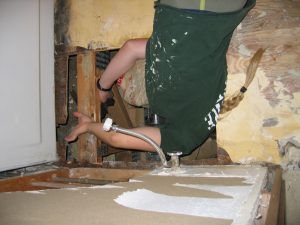
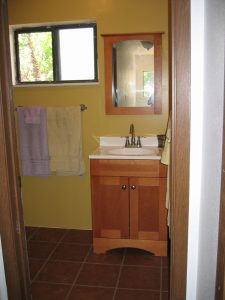
After the subfloor had been repaired and prepped for tile, the rest of the floor was actually quite easy. The large (12″ square) tiles we chose for the floor were very quick to install, and only a few needed to be cut on the wet saw. At that point, we installed the new combination vent/fan and grouted the shower enclosure and floor. After a couple of days, we were able to walk on the floor again, so we were right back to work taping the drywall and prepping everything for a nice paint job. Jess helped me pick out a nice tan color that complimented the tile design, and the Home Depot color computer picked out something vaguely whitish to go with the main color. I was pretty tired of being in the bathroom by this point, so Jess finished most of the painting, and in a nick of time. The day before the first of our July 4th guests were due to arrive, we scrambled to install the new vanity and sink in order to have a fully functional bathroom. Even with all of our hard work, we weren’t quite able to finish on time. We ran into some difficulties getting the new sink drain to align with the old p-trap and had to get creative with some flexible plumbing, and the sink wasn’t yet glued to the top of the vanity. We also hadn’t painted the ceiling either, but at least you could shower, and the bathroom looked a thousand times better.
