Nesting

As you likely know, Jess and I are expecting our first child around the end of March. Part of the tradition of having children seems to be the preparation—often called nesting. While we’re not going overboard in this activity, we do have a few fun projects. One of them centers around creating a space for baby Gribble. We’re converting our guest room (sorry visitors!) into a cozy baby room. In order to continue accommodating guests (we do want you to visit) we’ll be consolidating our office a bit, and we’ve added a lovely futon. It’s a little smaller than the old guest bed, but it might be more comfortable than the old mattress and box springs. Single visitors especially should be quite comfy.
One of the issues with the office/guest room consolidation is the absurdly large particle-board monstrosity we’ve been using as a desk. I swear it must have over 30 ft2 of surface area, and because of its design, almost none of the surface is usable. We have a massive stack of audio gear, my Korg keyboard, some pretty good sized studio monitors, a big widescreen monitor, a printer, a flat-bed scanner, and a Nikon slide scanner (see my last post). All told, there isn’t much room for the keyboard and mouse!
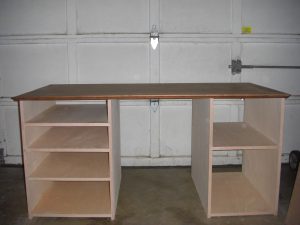
Well, in order to better fit our stuff, we’d been looking for a new desk. Unfortunately, we must be a little unique in what we need, because nothing on the market quite fits the bill. Instead, we decided to build a new desk. It’s way more time consuming, and a bit more frustrating, but you do get exactly what you want. The design I came up with incorporates a series of shelves on the left-hand side for the home-studio equipment and the laser printer. Another shelf on the right-hand side will hold the computer and film scanner with a single large file-cabinet drawer below. I may also add a skinny center drawer for pens and various computer cables, but that’ll strictly be an upgrade if it happens.

The desktop, and the balance of the design, is centered around a nice drafting table top I found a few years back when picking up some used bookshelves with our friend Ben. I managed to talk the former owner down to $1.00, so I considered it a good deal. It’s taken me several years to finally put it to good use. Of course, that constrains the dimensions, so I had to really try hard to cram as much into the space available as possible.
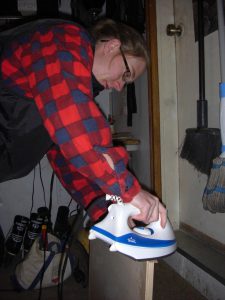
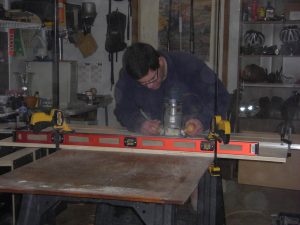
Jess and I got started on the project a couple of weeks ago by picking up some nice hardwood plywood from Home Depot. You really have to rummage through the stacks of wood to find a couple of pieces in good enough shape for furniture building, but eventually we managed to get a couple. After getting them home, we had to rip them down to the necessary size. It’s a bit unwieldy handling full sheets of plywood on our table saw, but we managed just fine. After getting everything down to size, Jess masterfully applied some edge banding to the shelves, while I cut rabbets into the sides with our router. In general the assembly is pretty straightforward, but a few of the shelves were a bit warped. (I told you it was hard to find good sheets at Home Depot). Eventually we got everything glued and screwed.

My least favorite part of these projects is the finishing and it really shows. I always get anxious to finish, and that, combined with my lack of space, leads to hasty sanding and ultimately mediocre finishing. Nevertheless, I had just enough of the “Red Oak” stain I used for a bookcase I put together a couple of years ago to finish the new desk. The stain is currently drying (and stinking up the house), so it should be ready for a coat of polyurethane tonight.
It’s coming together pretty nicely, and Jess and I are both excited to get it up into the office and into use. It should really open up the room and provide a better workspace. One project down and several more to go. Thank goodness we still have 2 months.


